How to Enable IPv6 on an Apache Web Server
![]()
I recently finished the long overdue process of enabling IPv6 on my web servers, and now I'm embarrassed I waited so long. This was one of those projects I had built up in my head, and it turned out to be much easier than I thought it would. So much easier, in fact, that I would demote it from a project to a task the next time I do it.
The vast majority of time was spent wading through the expert forums where people who do this for a living were discussing very specific use cases. After picking up a nugget here, and a scrap there, the solution for the rest of us turned out to be incredibly simple.
I doubt this post will make it to the top of search queries above the countless Apache forum posts from 2014. So if you made it this far, I feel your pain.
Table of Contents
The Goal
The purpose of this guide is to show you how to enable IPv6 on your Apache web server in a clear manner. Its not an exhaustive guide that covers all scenarios, but rather a simple process to follow for someone looking to get IPv6 working for their websites.
If this sounds like you, lets get started.
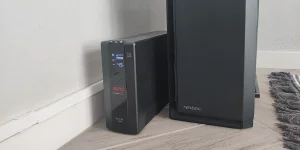
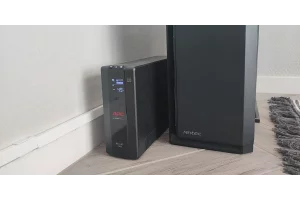
My Setup
Here is a list of what I'm using for this guide. If your list is different, make sure to adjust accordingly:
- Debian-based server OS
- Apache 2.4.62
- Digital Ocean VPS
- Bunny DNS
Get an IPv6 Address
The first thing we need to do is actually get an IPv6 address. This process is going to be different depending on your setup and/or provider, but it turned out to much easier in my case than I thought.
I'm using Digital Ocean as a VPS provider, and you can find their complete walkthrough here. If you're not, find your provider's documentation and activate it.
When you're done, you should have an address that looks like this:
2001:db8:85a3::8a2e:370:7334Configure Apache
This is where I spent about 95% of the time, and not because of the work actually involved. Every StackOverflow or Apache forum post said something different, so I had to do a lot of trial and error.
The two primary things we need to focus on are the Apache virtual hosts, and the Apache ports.conf file.
Ports.conf
I'm going to start here because this what gave me all the trouble. Open the file in nano text editor by running the following command:
sudo nano /etc/apache2/ports.confDoes it already look like this?
Listen 80

<IfModule ssl_module>
    Listen 443
</IfModule>

<IfModule mod_gnutls.c>
    Listen 443
</IfModule>
If so, you don't need to do anything on this file.
I assume this isn't the first page that came up when you started this project, so I will also assume you probably came across multiple guides or forums that said you have to add IPv6 like this:
Listen [::]:80
Listen [::]:443
If you added these into your ports.conf file, you probably kept getting an error when you tried to restart Apache.
Here's why... Listen 80 and Listen 443 already tells Apache to listen on those ports for BOTH IPv4 and IPv6. So when you add the second set (which is specific to IPv6) it can't bind the ports a second time.
I should note that we are barely scratching surface of this topic, because there are many use cases when you would use these. Specifically, binding them to a single IP address (like your server address.) However, that is not the purpose of this guide.
Apache Virtual Hosts
Since the ports.conf example above is basically the default config that ships with modern Apache, I could have probably started the entire guide right here. I needed to add that section in case you happened to go down the same path that I did.
Now for the virtual hosts.
There are a number of different ways you can set up your Apache virtual hosts, and due to old templates and inertia, I have separate files for both port 80 and port 443 on each domain. If you combine yours, the process is the same.
cd /etc/apache2/sites-availablels -lsudo nano YOURHOSTFILE.confWhether you have combined or separate host files for ports 80 and 443, find these:
Port 80
<VirtualHost *:80>Port 443
<VirtualHost *:443>Now update them to this:
Port 80
<VirtualHost *:80 [::]:80>Port 443
<VirtualHost *:443 [::]:443>When you're done, hit ctrl + x to exit, and press y to save.
Now restart Apache:
sudo service apache2 restartMake sure and do this for every domain you want IPv6 to work with.
AAAA DNS Records
The last step is to add an AAAA record to your DNS. This step is going to be slightly different for each provider, but the concept is the same.
- Hostname: (Some registrars will require and
@symbol, while others require it to be blank.) - Type: AAAA
- TTL: (30m works fine, but feel free to put whatever you typically use.)
- IPv6 Address: (Put the new IPv6 address you received from your server provider.)
As I mentioned above, I'm using Bunny DNS. This is what my settings would look like:

Note: If you use www as part of your primary URL, you should already have a cname set up for it. That cname will work for both IPv4 and IPv6, so nothing else is required.
Update Your Firewall
While its outside the scope of this guide, make sure you remember to update your firewalls. If you didn't originally configure to allow IPv6 traffic to ports 80 and 443, you will need to go back and do that before testing.
Test IPv6 Access
After your DNS record is added, test to see if its working. There's a number of ways to do it, but the easiest I've found is to use a free testing tool:
DNS updates and changes are not always instant, and can take time to propagate through the network. If your test fails, try again in 30 minutes before pulling your hair out and starting from scratch.
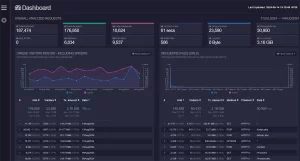
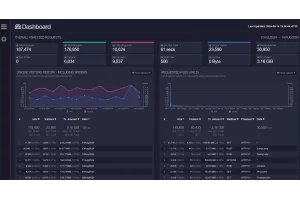
Monitoring
Before tackling IPv6, I was down the rabbit hole of extending my server monitoring capabilities. I ended up settling on GoAccess, and wrote about it here:
Using GoAccess to Monitor Multiple Websites at Once
I've only been tracking it for a few days, but the IPv6 addresses are already starting to roll in. Check out that guide if you're interested.
Final Thoughts
As I mentioned at the top of the post, I made a mountain out of a molehill whenever I thought of tackling this. While this guide doesn't explore the countless implementations and use cases, I hope it gets your server up and running on IPv6.
If you run into issues, or just want to say hi, feel free to reach out.