Add Shelly Wifi Button to Home Assistant

I recently changed out most of my home's lights with smart bulbs before realizing the error of my ways. Spouses, kids and guests do not care about how cool your automations are when they just want a light to turn on or off. I quickly found myself scrambling to find an easy solution that would "toggle" the lights through my control center, rather than brute-forcing the power like a regular switch.
The end goal is to get relays installed behind the light switches, but I wanted to prove the concept I had in my head, and needed something quick to appease the family. The guide below shows how I set up Shelly Button 1's to serve as an on/off switch without cutting power to the bulbs and breaking any automations and remote control ability.
Table of Contents
Equipment Needed
- Shelly Button 1
- Home Assistant
- Shelly Moble App
I am personally running Home Assistant through a Docker container on an UNRAID server. The plan is to eventually move it to it's own VM, but that is still on the never-ending to-do list.
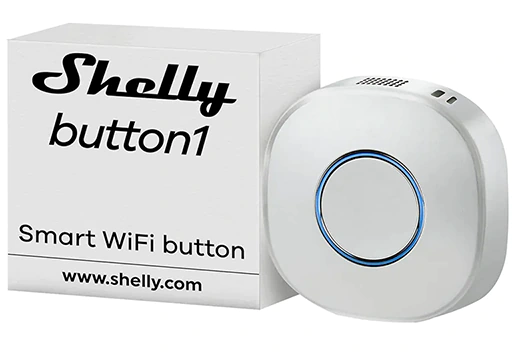
This is the specific Shelly button I am using, but I'm sure it's similar for other Shelly products:
Configure Shelly Button
NOTE: When working with the button, its a lot easier if you have it plugged in and charging. The button will stay on and connected, rather than going to sleep every few seconds.
The first order of business is getting the button to connect to your WiFi network. The easiest way is through the Shelly app. With the button plugged in, use the "Add New Device" walkthrough until the button registers with the app.
Once it is on your WiFi, there are a few housekeeping steps you will want to take care of:
Update the Firmware
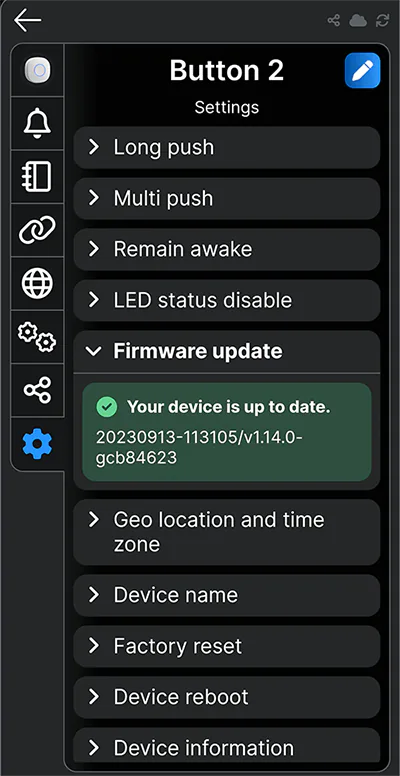
Once the device is added, go into the settings to find Firmware update under the gear icon. If there is an update available, there will be a button here to complete it.
Assign a Static IP
After the firmware is updated, assign the device a static IP with your router or DHCP server. Assigning static IPs is beyond the scope of this write up, but if you are messing around with home automation, its something you should know how to do on your specific router.
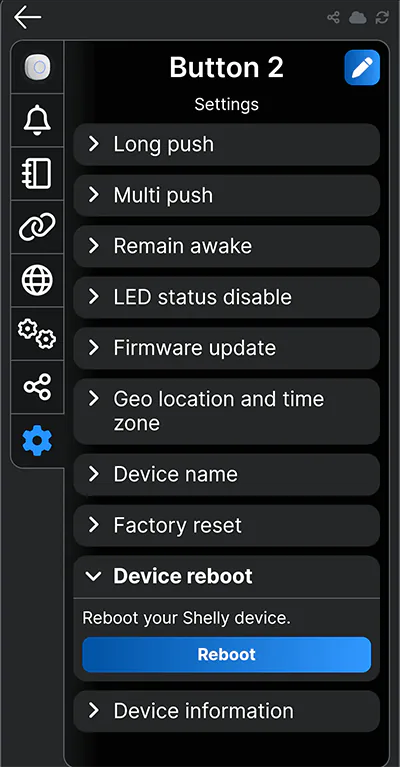
Once your button has a static IP, REBOOT THE DEVICE! It will not adopt the new IP address until it reconnects. You can do that from the device settings on the app here:
Disable Cloud
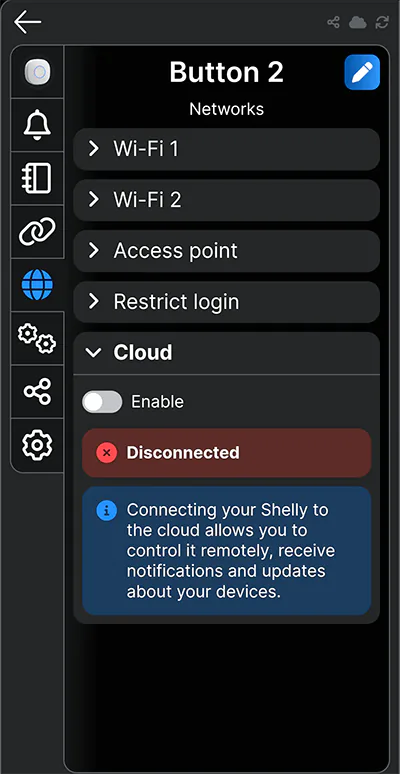
This is an optional step, and it will depend on your use case. If you want the ability to control things remotely and cannot access your network directly, it may be something to play around with.
I do this for three reasons:
- I want as little of my information and habits being stored elsewhere.
- To prevent cloud settings from interfering with my local settings.
- I can access my network remotely, so I do not need to use their app when I'm away.
You can also do this directly from the device settings in the app:
Add Home Assistant Integration
Now we are done with the Shelly app, and moving on to Home Assistant. If this is your first Shelly device, go to Settings > Device & services > Add Integration, then search for Shelly.
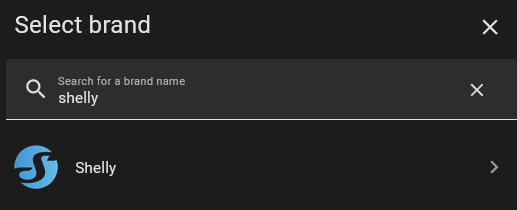
Now put in the static IP address (or hostname) you assigned to the new button:
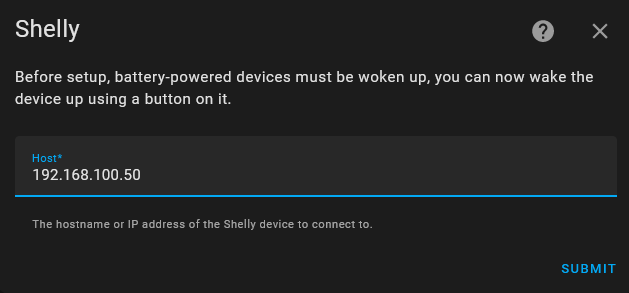
Now the button should be integrated with Home Assistant.
NOTE: If the integration keeps failing, its likely that either the device has gone to sleep, or the IP address hasn't officially been adopted yet. The best solution is to keep it plugged in so it stays awake, and try rebooting it again. If that still doesn't work, restart your DHCP server or go full nuclear and restart your router and Home Assistant.
Configure Unicast
This is where I got hung up the first go around. As mentioned on the Home Assistant Shelly configuration page, generation 1 buttons use the CoIoT protocol. Home Assistant also recommends using Unicast, which is not enabled by default on these buttons. The good news is its easy to change.
In your browser, type in your button's IP address to get to the settings. They are the same settings that were in the app. Under Internet & Security, go to ADVANCED - DEVELOPER SETTINGS. It should look like this:
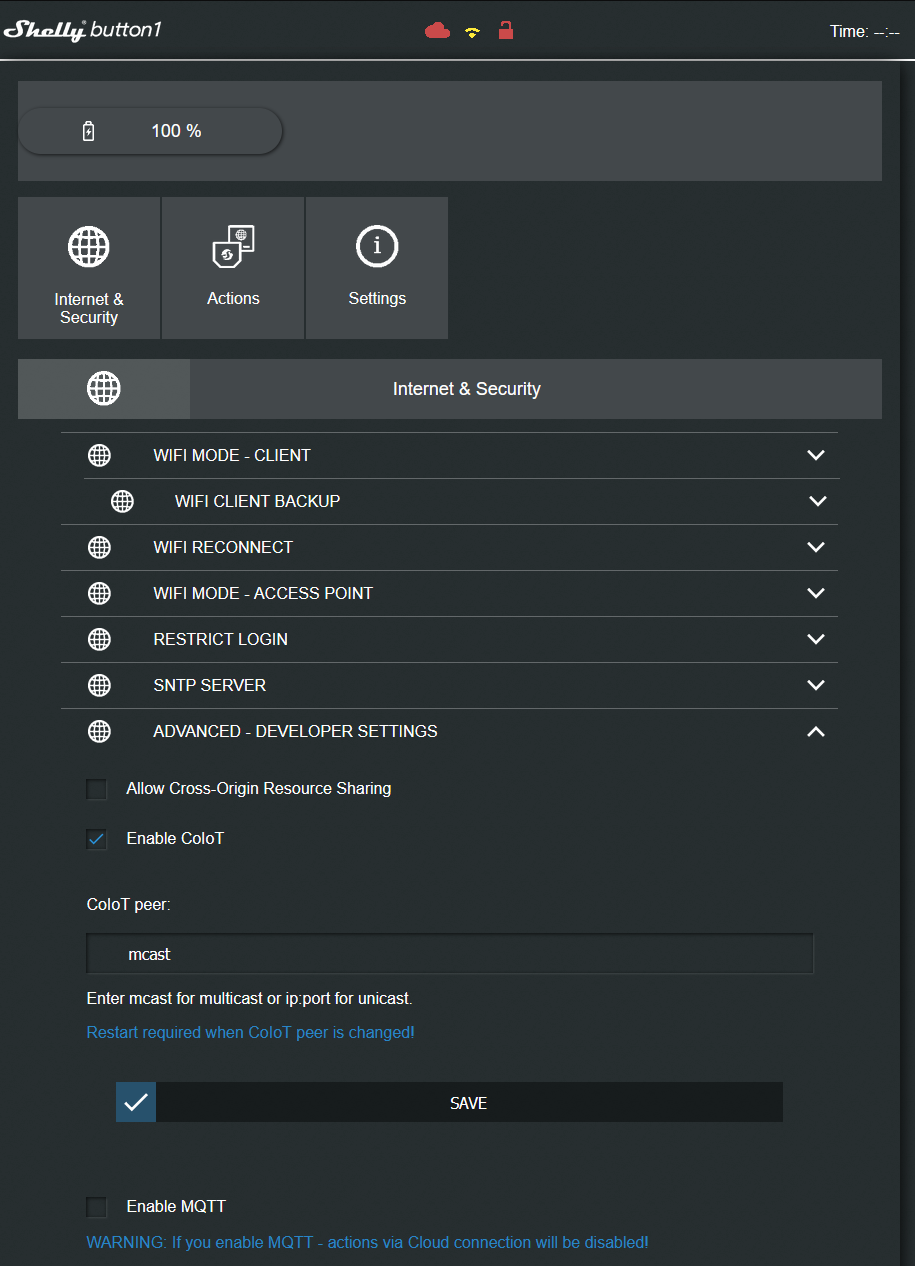
Now replace mcast with with the IP address of your Home Assistant and put the port number 5683 at the end. The format should look like this (use your IP, not this one):
192.168.100.10:5683Hit save. You can even reboot the device from this menu for good measure.
What this does is enables the button to talk the Home Assistant using Unicast. It is already enabled in Home Assistant, which makes it handy.
Home Assistant Docker Setup
I know I just said that Unicast is already enabled in Home Assistant, but there is a caveat. If you are running HA in a Docker container like I am, we need to make a simple edit to make sure that port is open to the container. I am running mine on an UNRAID server, so I will walk through how to do that. If you are not using UNRAID, modify the instructions to fit your personal setup.
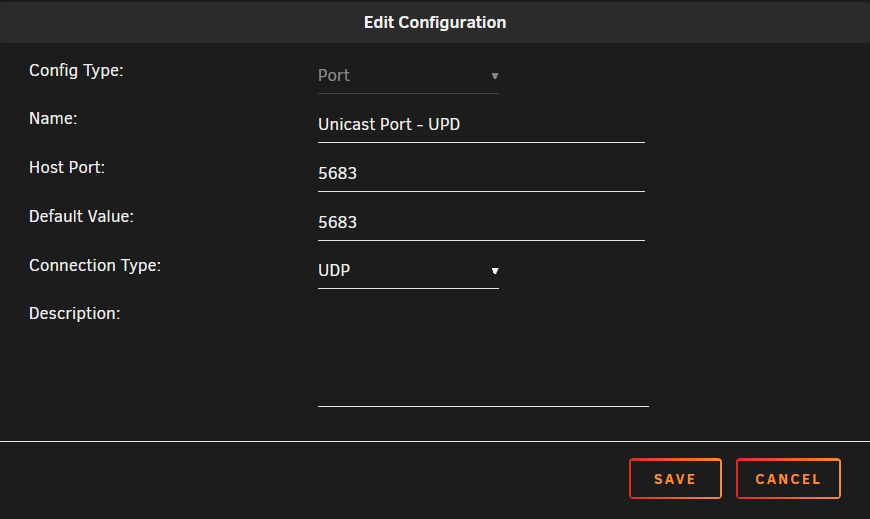
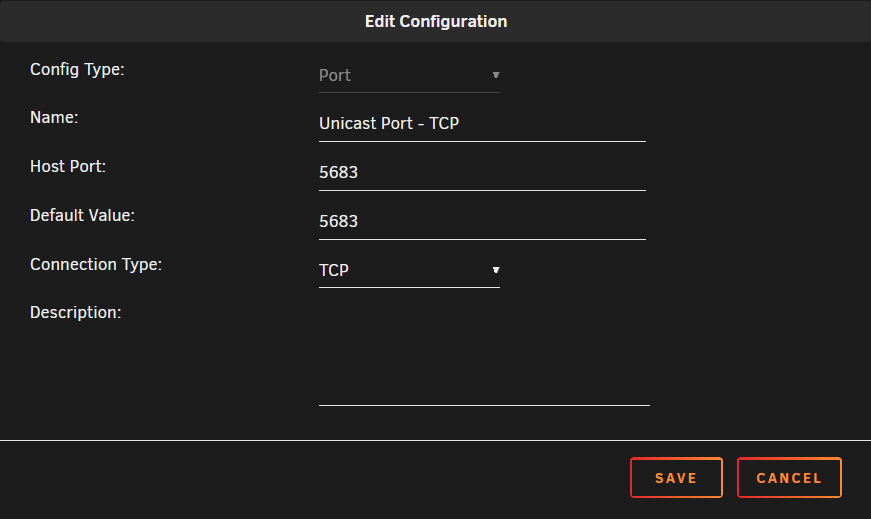
The objective is to open port 5683. I read conflicting information about TCP or UDP, so I just did both.
UNRAID Steps
NOTE: Its always best to make a backup of your Home Assistant before editing the Docker container. At the very least, backup your configs in the settings menu.
- Go to Docker > Home Assistant > Edit
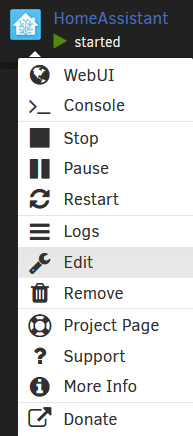
- Click Add another Path, Port... at the bottom
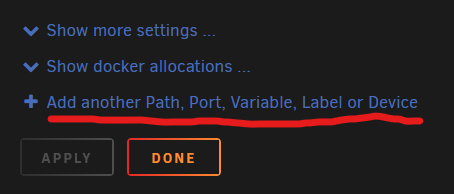
- Add port
5683for UDP
- Repeat for TCP
- Hit Apply
The Docker container should reinstall with the new port openings and all your previous settings. These port openings were a one-time setup. If you add more Shelly buttons or devices that use Unicast, you won't have to do this part again.
Home Assistant Automation
Now that we have that out of the way, its time for the fun stuff.
If you have jumped ahead and already took a peek into the Shelly integration, you might have noticed there is only one entity assigned to the device and its for the battery. This is great for remotely monitoring when it needs a recharge, but it doesn't do much more than that.
Where is the button?
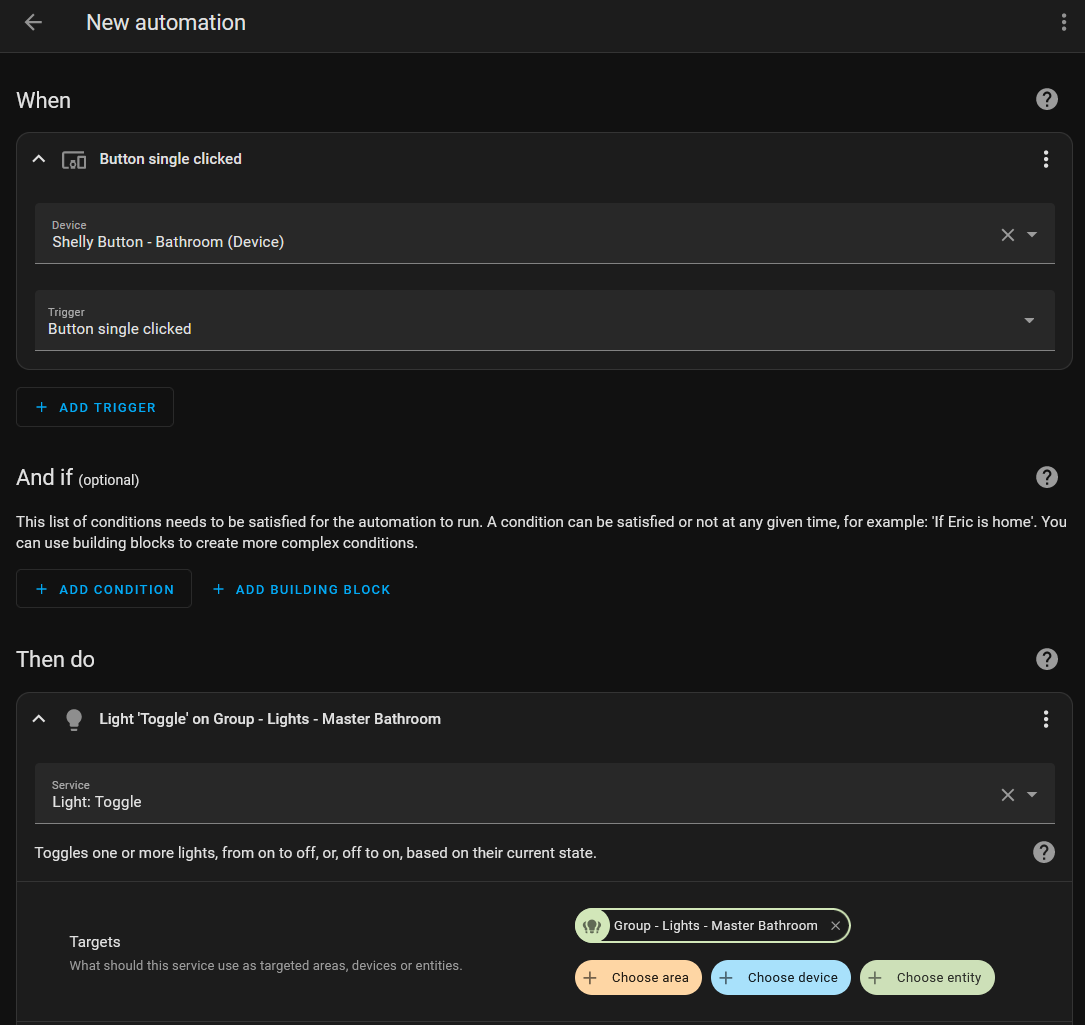
The Shelly buttons work by initiating automations, so they don't show up as entities. You will actually call it by the Device when creating or editing an automation.
- Go to Settings > Automations & scenes > Create Automation > Add Trigger > Device.
- Search for your Button's Device Name.
- Select the trigger you want. Options are:
- Button Single Clicked
- Button Double Clicked
- Button Triple Clicked
- Button Long Clicked
- Battery Level
- Add Action (What you want it to do).
The goal of my button is to Toggle the bathroom lights on/off, rather than cutting or enabling the power directly like the regular switch does. I have the bathroom lights combined as a group, so my new automation settings look like this:
That's it!
After saving, pressing the button once toggles the lights in my bathroom on/off without disconnecting power. That means Home Assistant is always in contact with the bulbs, even when they are "off."
In the last step you may have noticed their were four button options:
- Button Single Clicked
- Button Double Clicked
- Button Triple Clicked
- Button Long Clicked
This is nice because you can assign a different automation to each one. You could have different light settings, bedtime automations, etc. I'll save those ideas for a later post.
Final Thoughts
As with most new integrations, the first button I added took a few hours of pouring over various forum posts that were partially related to what I was looking for. Once I figured out the procedure, the second button took about 10 minutes.
I hope this helps you shortcut the process. If you run into any issues, don't hesitate to contact me. I'm glad to help.
More UNRAID Guides
For those fellow UNRAID enthusiasts, here are a few other guides I've put together:

